

To see the AutoVation Aluminum pedal installation in my '93 Eagle Talon, click here.
These aren't just for looks - the grippy clutch and brake pedal edges combined with the larger gas pedal design are meant to aid in heel/toe downshifting. After seeing these on eBay a while back, I've really liked the look. I added them to the Future Mods page, where my lovely friend Pam saw them, and bought them for me for a Valentine's day gift! I was quite surprised. Nothing says "I Love You" like the gift of car parts! Its nice that my friends and family now just have to look on the site for gift ideas - you may want to think about putting up a "web site wish list" for yourself. These would have cost $100 if I actually paid for them, maybe less if you catch them on eBay.
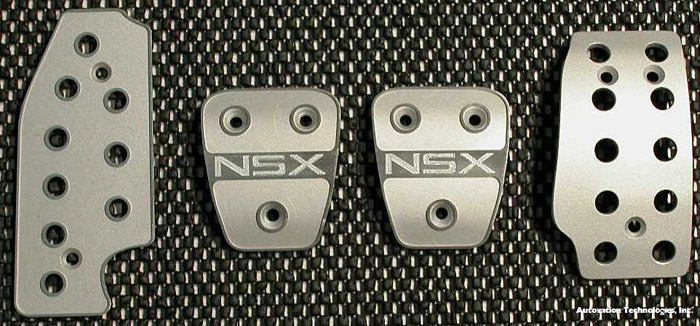
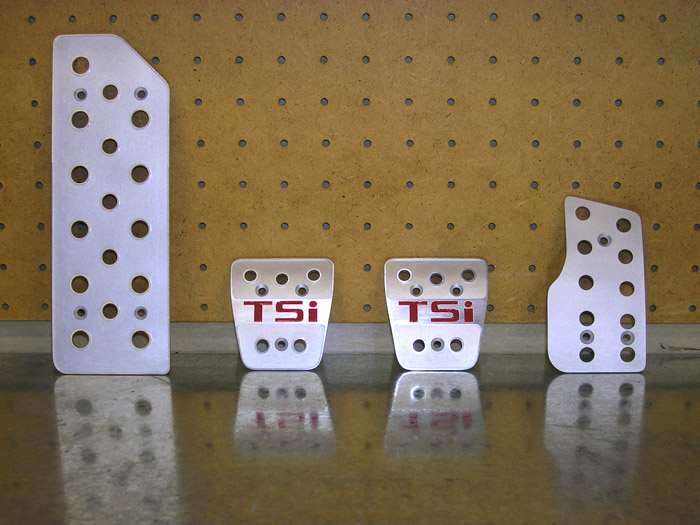
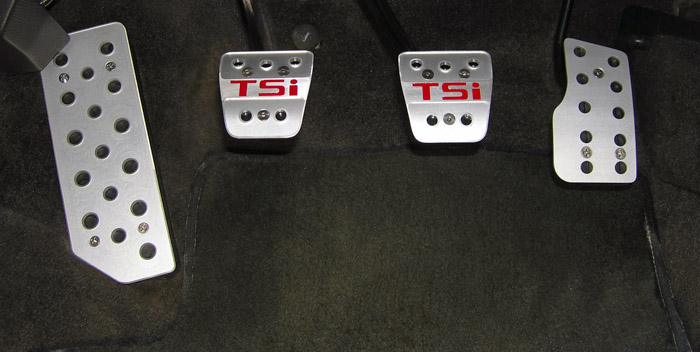
AutoVation Aluminum Race Pedals.
They come well wrapped with all the hardware and instructions you need. I did find it handy to review the install instructions from their web site, found here. The finish is nice but the quality of the machining isn't perfect as you can see some milling marks in the surface - but these are pedals and will wear, scratch, etc. with use so I'm not worried about it. The matte finish (like mine) doesn't show the marks as much as the machined finish version. AutoVation will take worn pedals back and bead blast them to "renew" them if you need to.
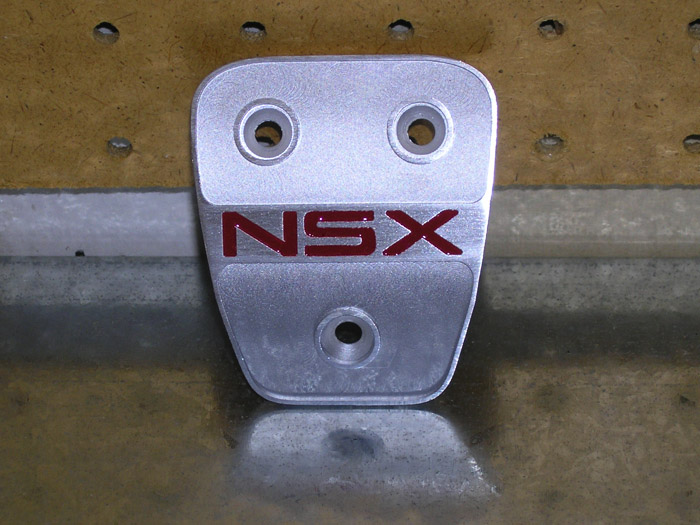
Filled in red lettering really makes these look good.
I took one look at the NSX lettering when I pulled them out of the box and said "These need to be red." I took my handy bottle of Honda R-77 Red touch-Up paint, courtesy of Lud Eng, and filled the lettering in to the edges. Actually, I filled past the edges, then used 220-grit sand paper laid on my bench top to sand the red off the top surface and clean them up. They turned out just perfect.
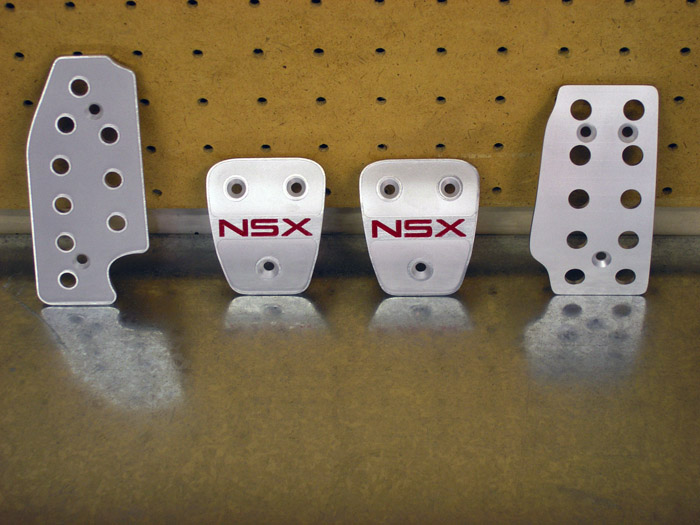
Ed Modified AutoVation Aluminum Race Pedals.
Now to actually get started - I'm in an hour and haven't done anything yet! I took the picture below as a "before" reference and saw how dirty it was under there - yuck! I think a little cleaning is in order before I get too involved.
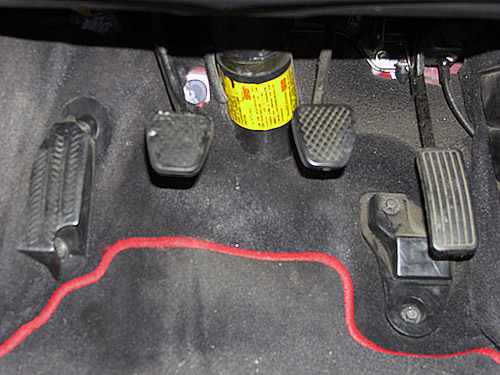
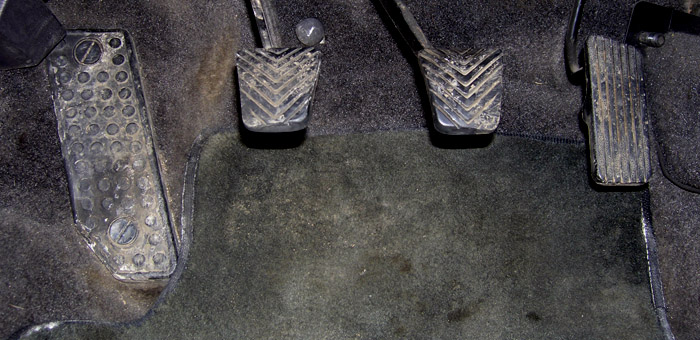
Here's what the stock pedals looked like before the project started.
I removed the rubber clutch and brake covers first, then grabbing the old 10mm I pulled the dead pedal and gas pedal stop out and washed them up. I also cleaned the brake, clutch and gas arms off all the grime and dust that's been accumulating since 1990. That's much better!
After cleaning, dead pedal installed.
I then installed the dead pedal cover. No mysteries here, just mark the 2 places, drill some small pilot holes (to prevent splitting) and screw in the stainless screws. One should almost shave the three rows of angle bars off first for a perfect look, but that's being a little nit-picky.
The gas pedal is next, and after cleaning it with a brush it was ready. The stock gas pedal cover stays in place and the aluminum pedal goes over the top of it. You may want to clean the carpet protector on the side of the console as well and put a towel down when you do it - the gas pedal and that side piece were really cruddy.
Secret Install Tip #1: Add a piece of thin double stick tape to the back of each pedal so when you are locating them, they stay where you want them.
The bottom screw of the gas pedal lined up with a slot in the stock pedal so the drill stayed put when I did the pilot hole. Once the bottom one was in, I trued up the right edge, pushed the pedal down to the floor and drilled the pilot holes for the top two screws. Two minutes total.
Then we get to the clutch and brake - and that's where the fun stopped. The clutch was the easier of the two, so we'll cover that first. Using the double stick tape to keep it in position, I put it on the metal pedal and felt around the back edges and got it spaced about like the rubber pad would be, then used a level to final position it. I used a scribe to mark the three holes and that was that. Drilling the holes was the fun part. See, holes through metal that are intended to be used with bevel head fasteners need to be drilled at a right angle to the metal. The bottom screw was pretty close, but the top two are WAY up and around, and my drill is far too big to get up under the dash.
Secret Install Tip #2: Use the rubber handle of hammer to push in the clutch so you can drill straight on to the metal.
The above trick worked great, though try holding in the clutch with one hand while drilling two holes with the other while laying on your side under a cramped dash with your shop light right in your eyes. That took about 30 minutes total.
Secret Install Tip #3: Go buy a right angle drill and avoid a lot of irritation.
The brake was the real bear, as you can't easily push the brake with your hand. I positioned the pedal as far to the right as I could to help the hell/toe spacing. Again the bottom hole was accessible, but the top two were far too high to align the drill correctly. Hell, they were too high to get the center punch in there. After dicking around with a couple different drills (I don't own a right angle one, but I can see one in my future) I said "screw it" and drilled a very small pilot hole at the wrong angle, then used bigger bits until I had an oval shaped hole that allowed the fastener to sit perpendicular to the pedal. The captive nuts on the back cover the entire hole I made, so no worries. Total time, 1:45. The instructions say you can do the whole job in half an hour? Right - if you have the correct tools maybe, and don't paint or clean anything.

The new pedals - looks a little better than the "before" pic.
Once all the pedals where on, I reinstalled the dead pedal, gas pedal stop and tossed the Genuine Zanardi Floor Mat back in. Its a whole new look, and they feel pretty good in the garage but I'll have to wait until after the snow clears to tell you how they work on the street and track.
UPDATE: Since it was nice out yesterday, I took the NSX out for a little spin to test the pedals and man do these things work! Like the Talon, I found that heel/toe was far easier to accomplish and the grip was very good. My review - go buy them now.
1993 Eagle Talon TSi Pedal Installation
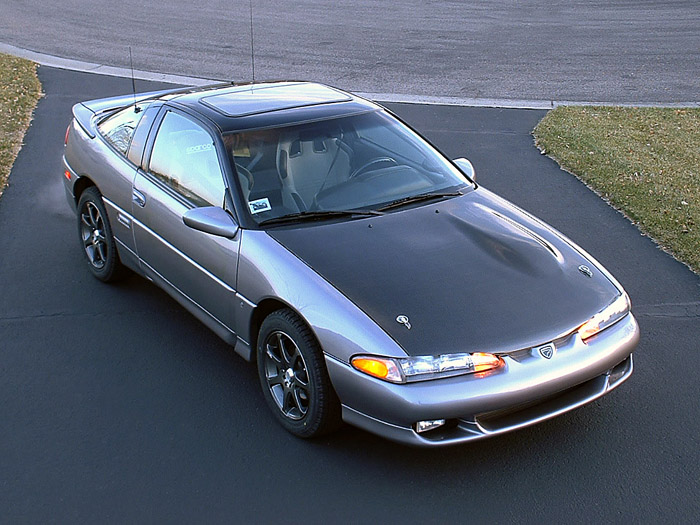
My 1993 Eagle Talon TSi AWD with more go-fast goodies than the NSX.
Seeing as I really liked the way these pedals feel in the Red Car, I got a set for the Talon as well. I've been heel/toeing all Winter (valuable off-season training) with the stock pedals so I'll be able to tell right away if there is a change for the better.
I painted the TSi logos with NSX red - because it was handy.
The installation went about as quickly as with the NSX; I cleaned everything, vacuumed, and installed them as above. The angle of the pedals was far more friendly than the NSX and the drill reached without any issues.
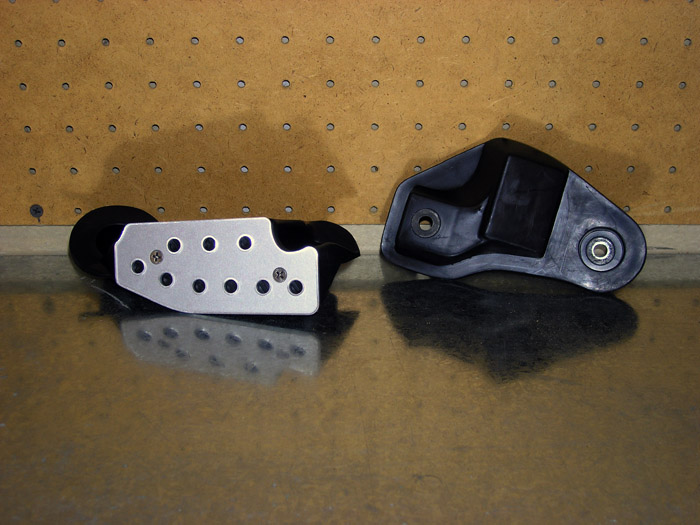
The "Before" pic is pretty grim.
The "After" pic looks very nice!
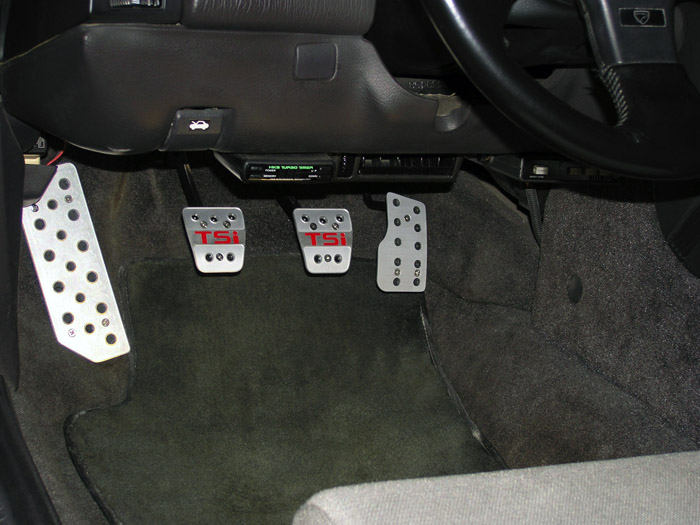
AutoVation Pedals in 1993 Eagle Talon TSi.
I couldn't wait to get out and test drive with these. The grip of the clutch and brake are so good you can use the pedal with just the very edge of your foot with confidence - you aren't going to slip off of these! The extended gas pedal really helps in heel/toeing and put a big smile on my face! This is a highly recommended mod for any car - go buy them now!